Sara's Delightful DIY
Saturday, October 20, 2012
Calendar Page Clipboard
I love products from Paper Source! They have the absolute cutest and best quality papers money can buy. They are expensive but you can't beat their designs. I like to get a wall calendar from Paper Source every year, and then use each cute sheet of paper for a project. I decided to use my favorite page from the calendar to decorate the back of my work clipboard...after all, that is usually the side people see when you are writing on it or carrying it around!
For this clipboard makeover, you will need scissors, a paint brush, Mod Podge and a Mod Podge roller.
Start by tracing the shape of your clipboard onto the paper of your choice. I chose to use this large nautical calendar page because it is 100% me! It is also somewhat thicker than poster paper so it is easier to work with.
Apply a thin layer of Mod Podge to the clipboard and stick the piece of paper on. It helps if you dampen the paper by spraying a tiny bit of water on it. It helps reduce bubbling and makes it easier to work with.
Use the roller to smooth out creases. Then apply another thin-to-medium layer of Mod Podge on top of the paper. Be sure to wipe the edges of the board while it is still wet so you don't get glops of Mod Podge on the sides.
Be careful though! As I was wiping the edges, my paper towel got stuck to the paper and pulled some of the calendar page off! I was frustrated at first but then I decided I liked the ragged look on the edges. It made the board look more antique to match the old look of the nautical print.
Let it dry for a couple of hours and you will have a personalized clipboard to match your style!
Thursday, October 18, 2012
Shoebox Canvases
I saw an idea on Pinterest that said you could use shoebox tops as canvases. I HAD to try it!
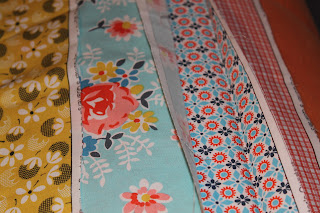
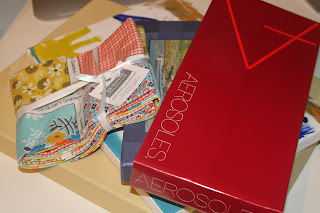
This project only cost me $12.99 for the fabric (if you don’t count the shoes I purchased in order to get the box tops:). They now sell fabric quarters all in one piece, by the way! I just had to unfold my yard o’ fabric and cut on the lines to get 4 different pieces of fabric that all coordinated! I also had a box top from a decorative box I wasn’t using, and an old canvas I found. All you need is scissors and a glue gun to get this project done!
I first played around with the arrangement to see how I wanted to do my layout. After that, I tried out the fabric on the “canvases” to see which pattern I wanted on which size.
After that I cut my fabric to size. I like to leave an inch or an inch and a half all the way around so you have plenty of room to glue.
I just started gluing sides down and pulling the fabric taut, but not too tight on the cardboard box tops. I didn’t want to cause them to bend in a weird way. Make sure to glue the sides directly across from one another.
Put a nice neat crease on the corner and glue in place. Keep adding glue if you don’t get a neat corner.
I hung them in the hallway and they look GOOD!
Corkboard Upcycle
This is an upcycle on a corkboard square I did a while ago…I thought I would share this too. I already had this board in my office, but it was looking a little ratty. It was by a window so it had sun-faded spots on it and it had a ton of pictures pinned to it over the years. I thought I would freshen it up with a little paint.
I started by measuring out the stripes evenly and applying the tape. You can use any size tape you want but I liked the bigger stripes…they cover more of the ugliness! I pushed down on the tape and pulled it very taut to make sure it was going to make a crisp line when I peeled up the tape.
I used some white acrylic paint to fill in the stripes. Make sure you apply the paint in the same direction of the stripes…it will minimize bleeding. I let the paint dry for about 5 or 10 minutes and then carefully peeled the tape off while it was still sort of wet. I didn’t want to risk having the paint dry completely and the peel off in spots that would mess up the lines.
Even though the board is well used, I really like the fresh, nautical vibe of the stripes. It matches my desk and office accessories well!
Dollar Store Fall Wreaths!
I’ve got Fall Fever! I am willing it to get cooler by decorating with Fall decor…even though it was 90 degrees today!
The total cost of this wreath project was $8. I bought 2 wreaths, two spools of ribbon, and 4 pieces of fall leaf garland. I chose the garland over the bags of loose leaves even though they were cheaper because I liked the variety of colors and some of the garlands even had glitter on the leaves…SOLD!
I took all the leaves off of the garland and started applying them to the wreaths with a hot glue gun. I did a base layer first, and then I started layering on top of them to add some variety. I tied a big bow at the top on the first wreath and decided to hang it on the staircase.
I used a thinner ribbon on the second wreath, and then I created a long loop to hang it with. I glued the knot of the loop to an extra leaf, and it worked well to conceal the unsightly knot and the nail in the door.
I finished both in about 45 minutes…quick, easy, inexpensive, and lots of fun to make!
Spooky Succulents!
I made these gifts from soup cans and succulent cuttings! It was so easy and I didn’t spend a dime. All you need is some craft supplies from around the house and you are ready to go.
I have been rooting succulent cuttings to give as gifts and this is my first attempt to make a gift out of them.
I first transferred the plants into the soup cans. If I were you, I would measure the paper you are going to cover the cans with BEFORE you plant.
After that I got the paper and glued it to the outside of the can. There was some leftover glue from the soup label that used to be on it. I started by attaching the paper there and then wrapped it around and glued the other end.
I used bold tip pens to write Happy Halloween on the little flags-I thought it made it look spookier! I traced out the flag pattern with pencil before writing and then glued the ends to the wood skewer (cut the skewers in half with sharp craft scissors).
After that I just added some cut-outs from the decorative paper scraps and voila! A perfect gift to help someone start their own succulent plant!
Subscribe to:
Comments (Atom)


